Please do not block ads on our site. Clicks on ads help us exist, grow and become more useful for you!
Installation of a Y Strainer
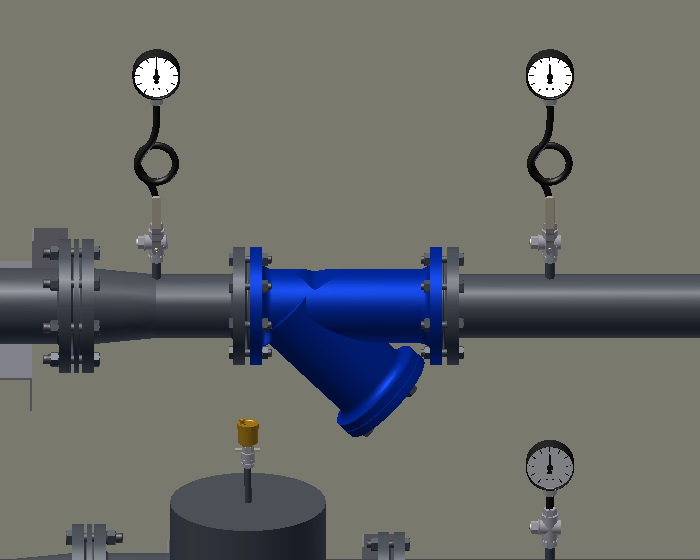
The installation of Y Strainers should be carried out according to the manufacturer's recommendations, but also consider the following:
- Y Strainers can only be installed on a horizontal or vertical pipeline with flow from top to bottom.
- When installing on a horizontal pipeline, the sludge collection chamber should be below the axis of the pipeline.
- Pressure gauges should be installed before and after the filter.
- The section with the filter should be equipped with shut-off valves, necessary for disconnection and cleaning.
- The filter body must not bear torsional, tensile, bending, or compressive loads from the attached pipeline.
Sequence of packing a threaded joint
1. Take a flax fiber strand with enough threads so that when twisted, its diameter is approximately equal to the depth of the thread. The length of the strand should ensure 1.5-2 times the number of thread turns.
2. Starting approximately 50-70 mm from the beginning of the strand, slightly twist it, place it in the first thread turn, and, holding it with your hand, tightly wind the long strand clockwise, laying it in each thread turn.
3. Upon reaching the end of the thread, continue winding with a second layer, moving the turns towards the beginning of the thread. The length of the second layer should be approximately 2/3 of the thread length.
4. The remaining end of the strand (50-70 mm) should be wound in the same way, clockwise, from the end of the thread to its beginning.
5. Apply a layer of sealant on the surface of the packing.
6. Hand-tighten the connecting elements. With proper packing, the mounted element should turn 1.5-2 turns.
7. Continue tightening the element with a wrench or torque wrench. If the mounted element needs to be positioned in a certain way, finish tightening in the desired position.
With proper packing, the tightening force should not exceed the torque specified below:
| DN15 | DN20 | DN25 | DN32 | DN40 | DN50 | DN65 | DN80 | DN100 |
|---|---|---|---|---|---|---|---|---|
| 70 Nm | 95 Nm | 120 Nm | 150 Nm | 190 Nm | 230 Nm | 280 Nm | 350 Nm | 400 Nm |
Torque values for tightening flange nuts
| DN | Nut/Bolt | Torque, Nm |
|---|---|---|
| 15 - 32 | M 10 | 15 - 30 |
| 40 - 65 | M 12 | 35 - 50 |
| 80 - 100 | M 16 | 75 - 100 |
| 125 - 150 | M 16 | 80 - 120 |
| 200 | M 20 | 150 - 200 |
| 250 - 400 | M 24 | 340 - 410 |
| 500 | M 27 | 340 - 410 |


 EN 1092-1
question : comment : feedback
305
 Catalog of
 Y strainers
Zetkama
Genebre
Genebre
Danfoss
Ayvaz
ARI Armaturen
Hawle
Hawle
Samson
Brandoni
IMI Hydronic
FAF
IVR
CMO
Polix
LDM
Honeywell - Resideo
Honeywell - Resideo
Oventrop
Herz

