Please do not block ads on our site. Clicks on ads help us exist, grow and become more useful for you!
Replacing the gaskets of a plate heat exchanger
The service life of the elastic seals of a plate heat exchanger during operation, which is typical for heating and hot water supply systems, is approximately 8 years.
Premature wear, aging, and loss of elasticity of the interplate seals may be the result of:
- water hammer and pulsating pressure jumps;
- operation in modes of the working environment that exceed the technical characteristics of the heat exchanger seals;
- prolonged shutdown of the heat exchanger filled with the working medium;
- mechanical damage to the seals due to slag flow or unskilled disassembly;
- chemical cleaning of the heat exchanger with reagents aggressive to the materials of the gaskets / plates.
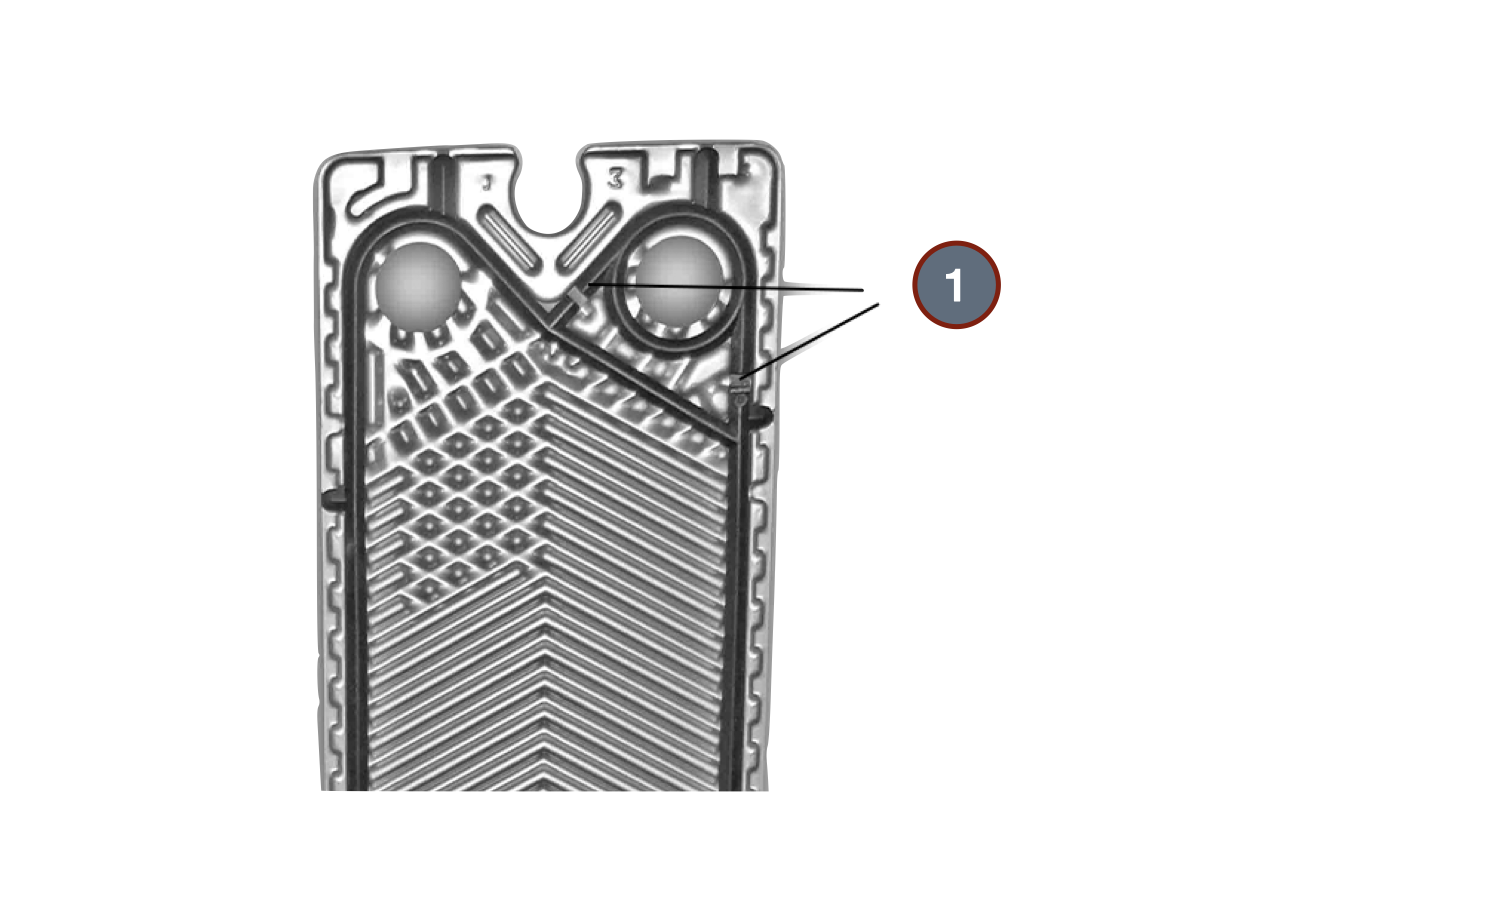
- 1 - Drain ports signaling coolant leakage through the gasket into the neutral zone
The appearance of the working medium through the drain holes in the neutral zone of the plate indicates damage to the sealing gaskets, but does not mean that there has been a flow of the heat carrier between the heating and heated circuits.
Insignificant leaks from the interplate space during cold start-up and start-up of the working medium in one of the circuits for some types of heat exchangers are the norm, but for most devices, they indicate a loss of elasticity of the gasket material, which is also treated only by disassembling the heat exchanger.
Sequence of replacing the seals

- 1 - Fixed plate
- 2 - Plate support foot
- 3 - Tie bolt
- 4 - Bearing
- 5 - Lock washer
- 6 - Nut
- 7 - Frame support foot
- 8 - Frame
- 9 - Movable pressing plate
- 10 - Plate gasket
- 11 - Plate pack
- 12 - Rack
1 Drain the heat transfer fluid and disconnect the inlet pipes with visible damage from the heat exchanger.
2 Measure and record the size of the plate block of the heat exchanger between the movable and main plates.
3 Draw lines diagonally across the plate packet with a marker, which will allow assembling the plates without twisting them in the previous sequence.
4 Loosen all the bolts of the fastening bolts diagonally. Unscrew and remove the fastening bolts from the heat exchanger.
5 Slide the movable plate aside and carefully, without damaging the gaskets between the plates, slide and remove the plates one by one.
6 Each plate removed from the heat exchanger must be numbered with a marker to be placed in the block in the same sequence in which they were initially installed.
7 Damaged gasket is removed without using tools that can scratch the surface of the plates, and a new one is placed in its place.
8 Cleaned plates are stacked in a packet one by one with a gasket against the fixed plate in the sequence in which they were removed from it.
9 Push the movable plate to the assembled block of plates, install the fastening bolts into the heat exchanger and tighten them diagonally until the plate packet reaches the size measured before disassembly.
10 Connect the inlet pipes and fill the heat exchanger with the working medium. The rate of pressure rise should not exceed 10 bar per minute.
11 After assembly, test the heat exchanger with a pressure of 1.25 times the working pressure.


 Alfa Laval : Instruction Manual
question : comment : feedback
273
 Catalog of
 plate heat exchangers
Funke
Sondex
SWEP
Tranter
Alfa Laval
Тепло-Поліс
Термопром
Анкор-Теплоенерго

